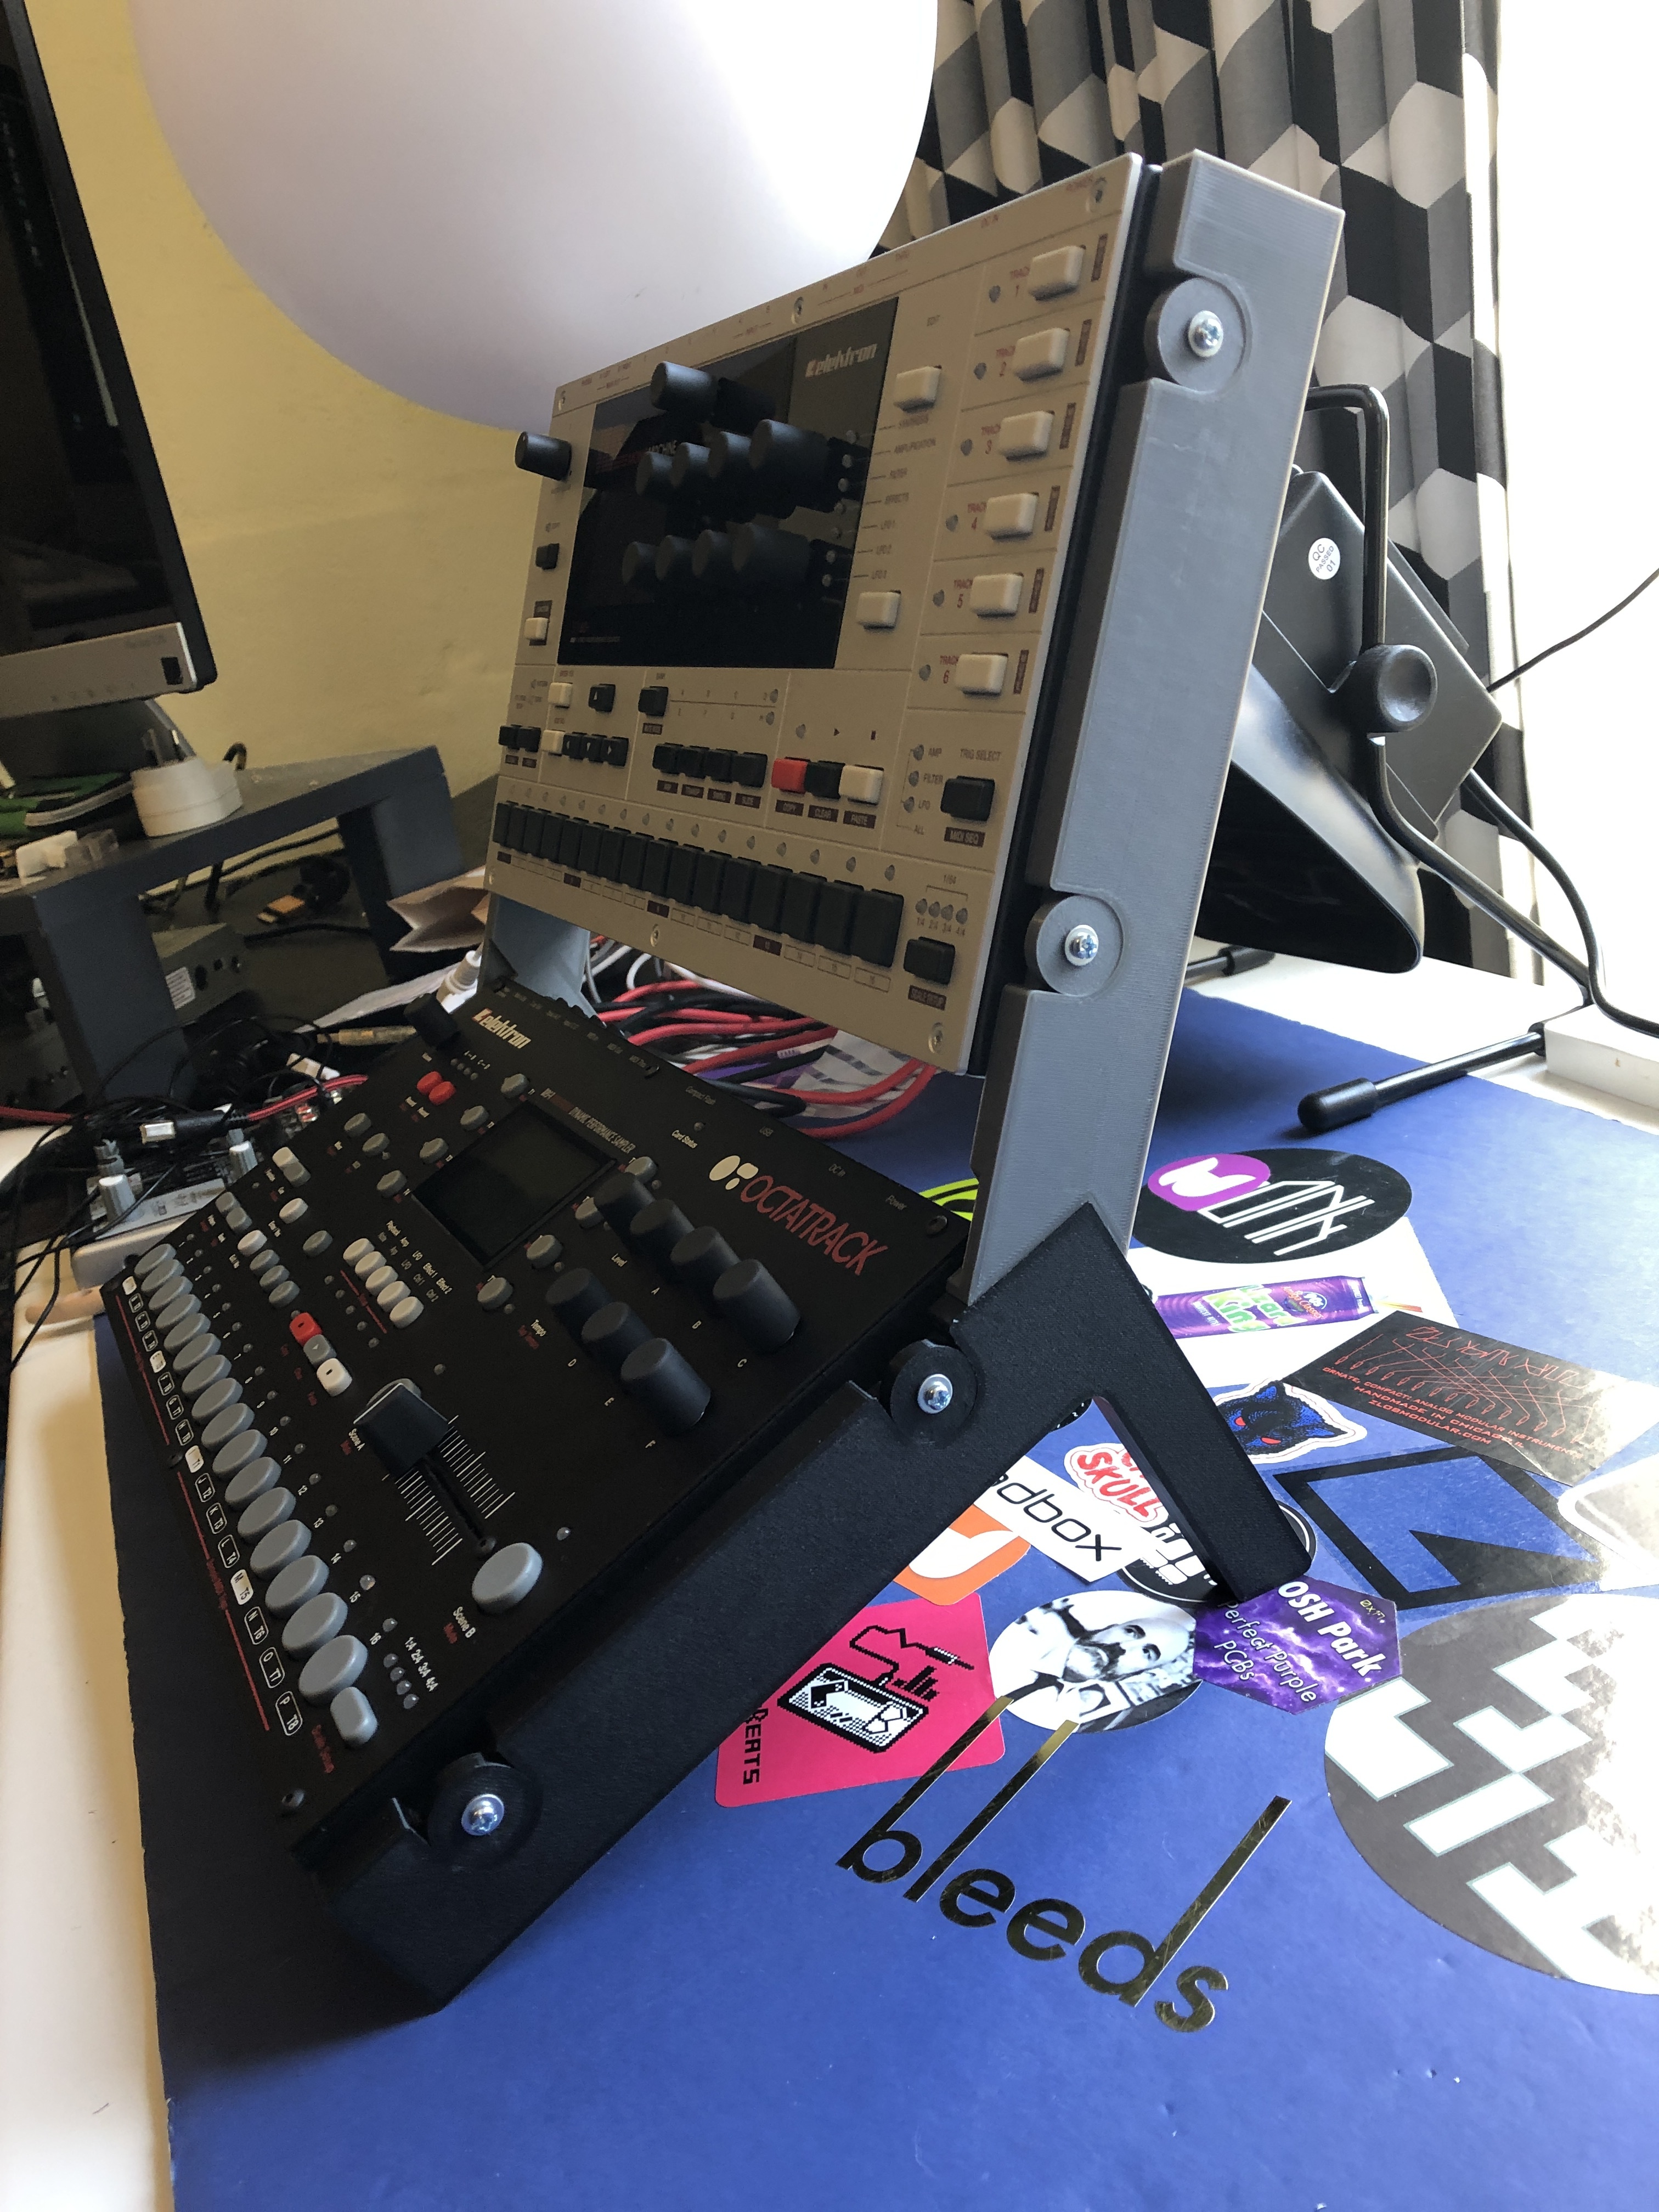
I got sick of having to unscrew my homemade 2-tier wooden stand every time I wanted to take either my Octatrack or Monomachine out (e.g. to make music on the couch), so I spent the weekend designing and prototyping this modular, quick-release stand.
It even works with the PL-2 covers…

So far, it’s a lot more sturdy than I expected, but I will give it some time and more testing before I go opening an Etsy store to sell them. Overall though, I’m pretty happy with how balanced it is, and how firmly everything fits together—it actually feels more solid than my previous (somewhat dodgy) wooden stand.
Some more shots:


STL files
Elektron quick release stand.zip (62.2 KB)
Includes files for:
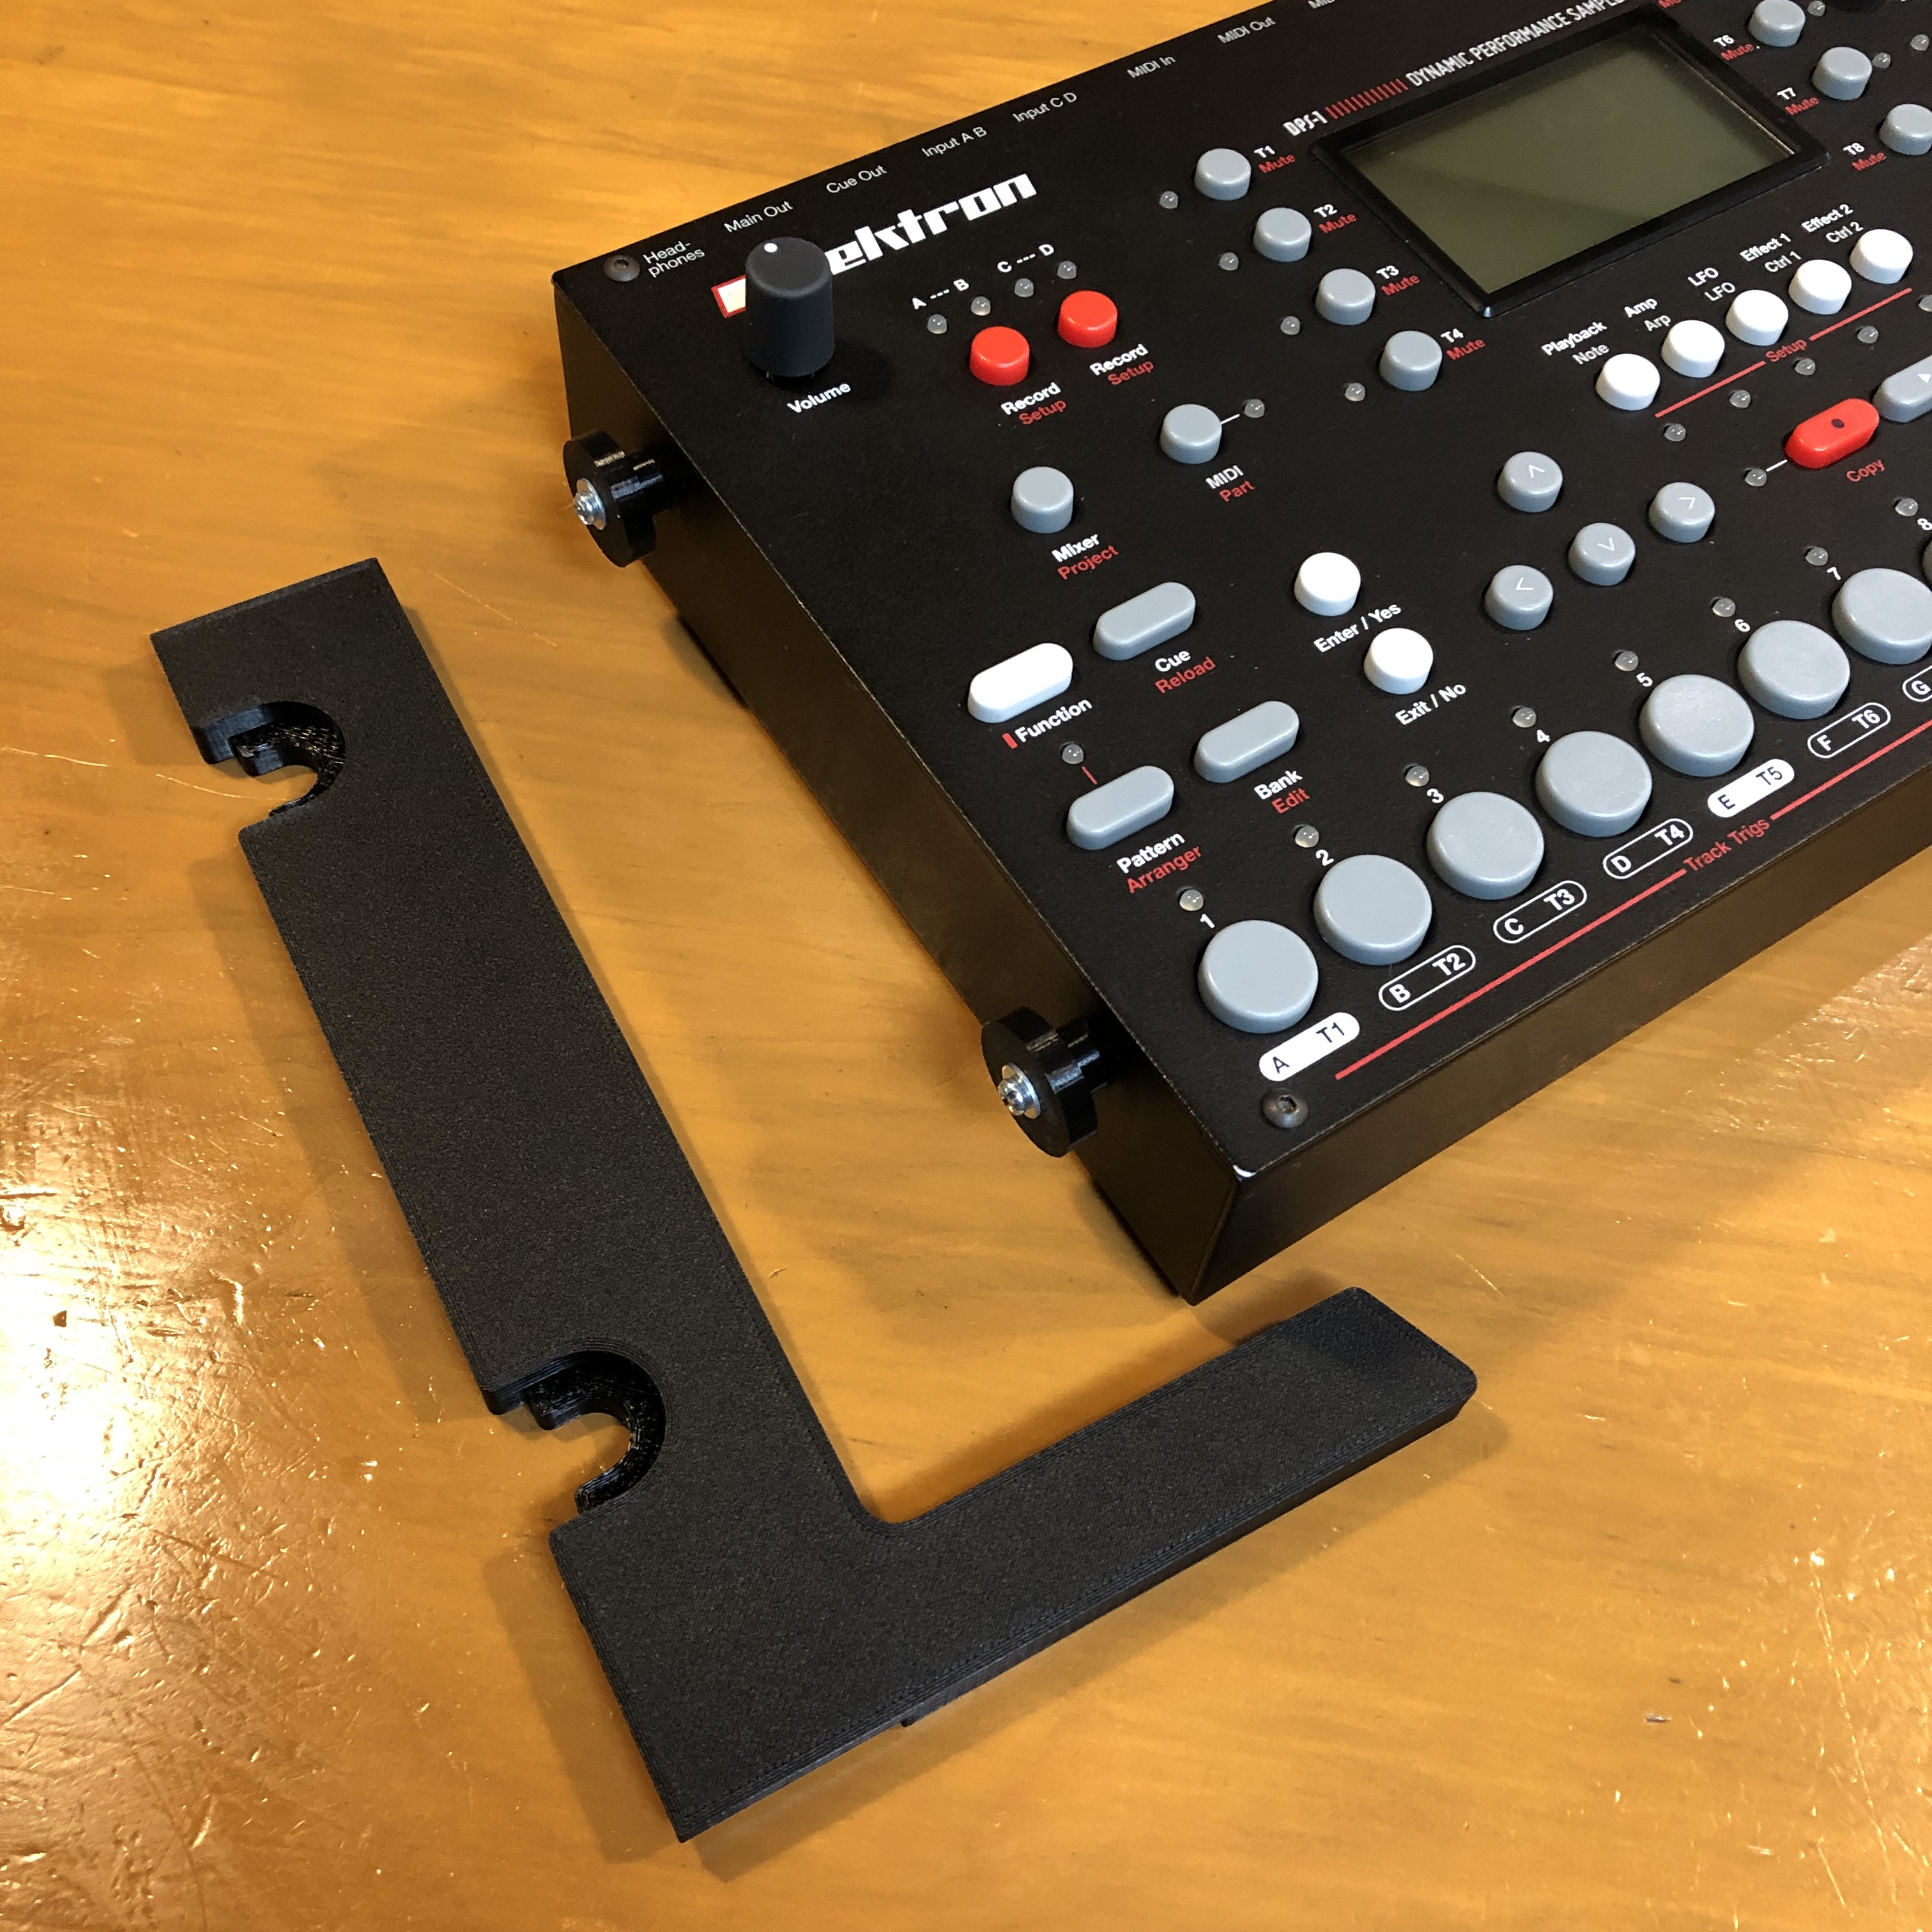
Side buttons
Left / right base “legs” / single tier design
Left / right upper supports / second tier
Technical details / instructions
For the full 2-tier stand, print 8 of the side buttons, and one of each of the L/R files. For the single stand, just print 4 buttons and the L/R base files.
Use 15mm M3 screws* to attach the side buttons to your Elektron device, with the thinner side facing inwards, against the side of the device.
If you’re making the full 2-tier stand, you’ll need to connect the top tier supports to the base legs before attaching them to your machines. They should just click in to each other; see the images for more detail. Then, the machines should fit right in to the slots; attach the bottom machine first otherwise the stand will be unbalanced. The stand does slide a little, so attaching some thin rubber pads on the underside of the legs will help to keep it in place.
They sit pretty firm in the stand; you’ll need to use some amount of force in order to separate them again. This is by design, to make sure the machines don’t fall out.
As this is modular, there is potential to make other angles, different supports for different pieces of gear, etc. My next design will likely be for Digitone/Digitakt/Analog Heat boxes as they have VESA mount holes on the base.
* IMPORTANT NOTE: Do not use longer screws, or over-tighten them. I highly recommend also using a washer between the screw and the button. The reason for this is because Elektron placed their circuit boards in line with the threaded holes on the sides of these machines, and using anything longer than a 15mm screw for this will most likely damage the board.


